
Ready-to-Use Checkout Screens
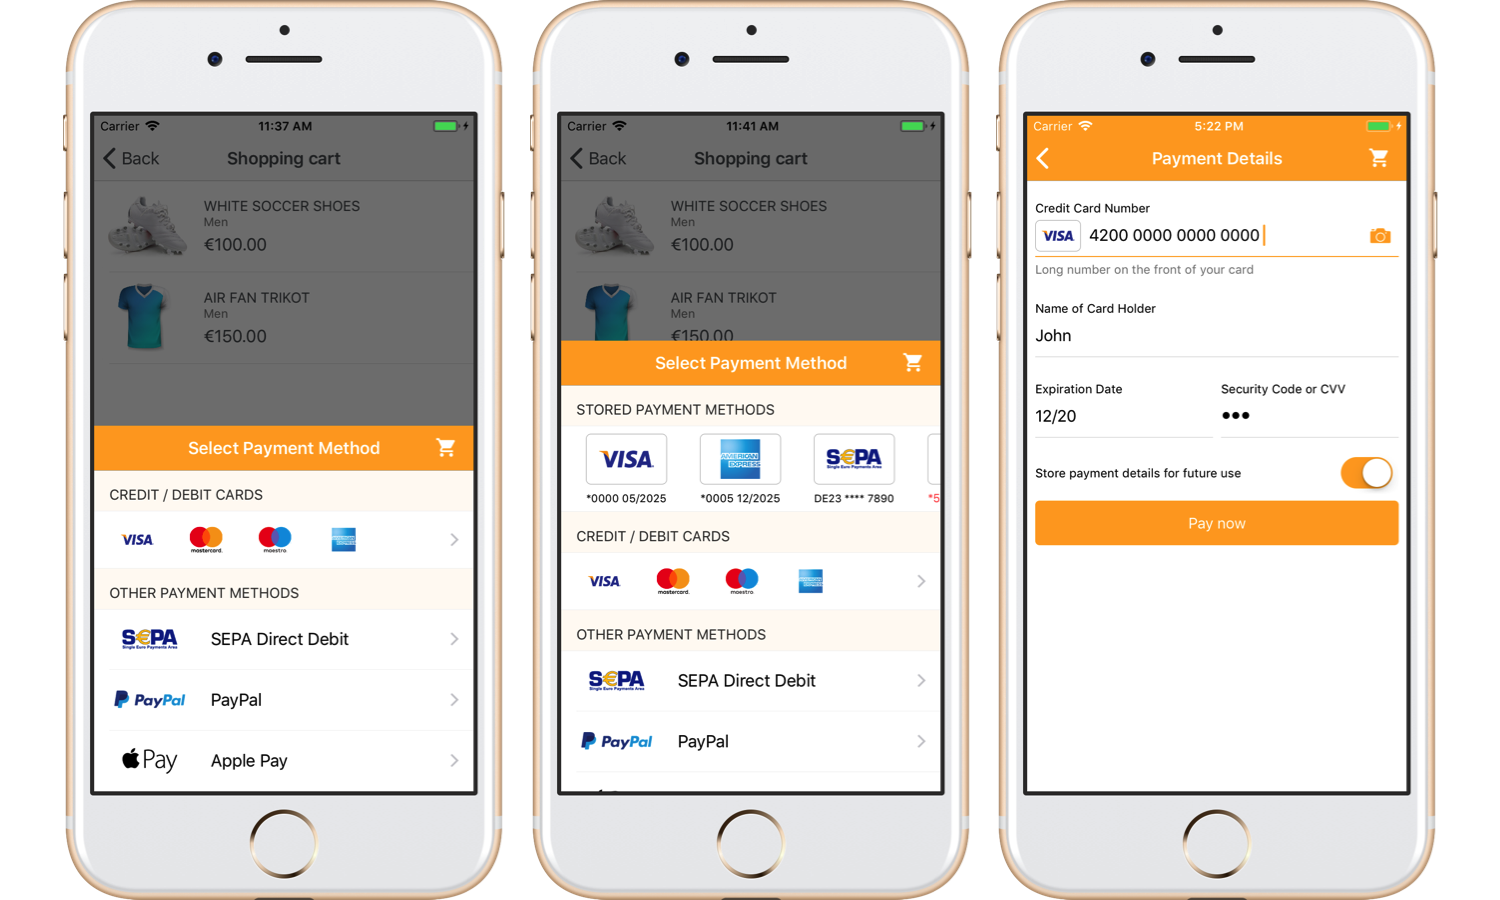
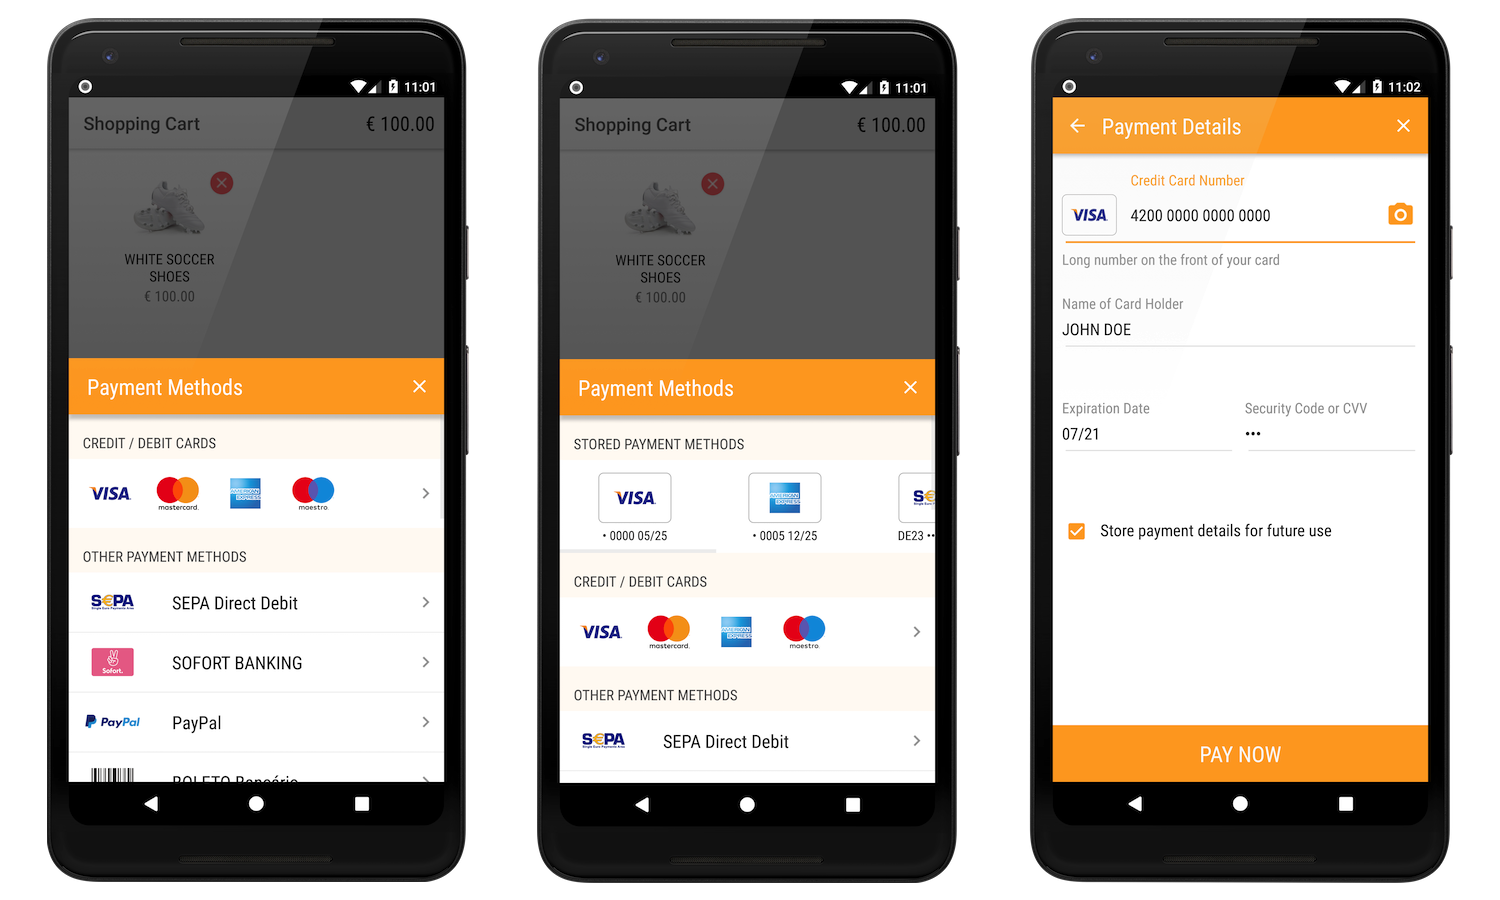
To speed up your development process, we provide ready-to-use checkout screens. This takes away the burden of having to design and implement your own checkout screens. These screens define a customizable checkout flow which integrates nicely into your application.
There are two ways you can use our checkout screens. The following table will help you choose the solution that works best for you.
| Drop-In Checkout | Drop-In Forms and Payment Buttons | |
|---|---|---|
| Integration steps | 1. Set list of supported payment brands 2. Present checkout screens Integration guide |
1. Create payment button 2. Present checkout for specific payment brand Integration guide |
| First presented screen | List of payment brands and stored cards (optionally) |
Depends on specific payment brand:
|
| Benefits | 1. Ready screen with list of payment brands | 1. More flexible solution, use drop-in buttons or any other controls to display payment brands 2. The best way to add specific payment brand to your app |
Payment methods
Synchronous payments
In case of synchronous payments, shopper's payment details are collected only in the app. No redirects for additional checks and authentication are needed.
To learn how to integrate SDK with our prebuilt checkout forms, follow the First Integration guide.
Asynchronous payments
For some payment methods additional shopper verification (3D Secure) or account authentication is required. In this case the shopper will be redirected from the payment form to the issuer page to verify his identity.
See how to configure your app to return from app switches in Asynchronous payments guide.
Checkout Screens Customization
UI customization
We built the Checkout project so that from the default theme that we provide you can define your own appearance and apply the attributes you want to customize.
Full reference can be found in the Customization guide.
Internationalization
Our ready-to-use UI currently supports a number of different languages.
All labels are customizable, you can change them as well as add translations for the languages that are not supported yet (including right-to-left).
You will find the full list of supported languages and detailed instructions in the Internationalization guide.
See more customizations in Advanced Options.